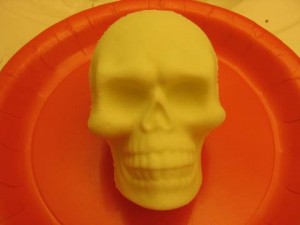
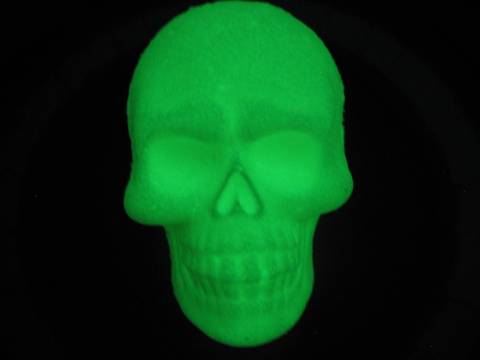
Glowing skull bath bombs are both fun and easy to make. This is one recipe that your friends and family are sure to remember.
Glowing Skull Bath Bomb Recipe
(makes two 3 inch 3D skulls)
Ingredients:
1 cup baking soda
1 cup citric acid
1/2 cup corn or tapioca starch
4 tsp skin safe glow-in-the-dark powder (Note: the powder can be purchased in different colors)
1/4 cup light weight carrier oil like Jojoba, sweet almond or grape seed
2 tsp Lemon essential oil
Soap safe colorant or food coloring (I used no colorant for this recipe)
Instructions:
Sift together dry ingredients. Add carrier oil and mix by hand. I prefer to use my hands because I get a better feel of the consistency of the mixture. When the oil and dry ingredients are well blended add the essential oil and several drops of soap safe colorant or food coloring if desired. Continue to mix by hand until all ingredients are well blended. Squeeze a handful of the mixture in your hand. It should have the consistency of wet sand and stick together. Add a tablespoon more of carrier oil if the mixture is not sticking together and mix again. The beauty of this recipe is you can make your mixture more moist without having to worry about the mixture starting to fizz before you get it in the bath tub.
Once you have achieved the correct consistency, start packing the mixture into the mold. I started with the face of the skull first packing in small amounts of the mixture at a time. I wanted to be sure that there were no air pockets in the face details of the mold. Overpack the mold so that it is slightly mounded. Repeat this process for the back portion of the mold. When both parts of the mold have been packed, squeeze them together twisting slightly to fuse the two halves of the mold. The twisting action will also get rid of any excess mixture from between the molds. Note: If you mess up, just dump the mixture back into the mixing bowl by tapping the molds lightly then blend again and retry.
When you have successfully packed molds together, lightly tap the molds and they will separate easily from the contents. Set the new glowing skull bath bomb on wax paper and mold your second skull. If you find yourself running a bit short of the mixture, add 1/4 to 1/2 cup baking soda and a bit more oil to keep the “wet sand” consistency.
After you have finished let the bath bombs sit for at least twelve hours in a dry area. This time of year in the Seattle area, where I live, the air is really damp so I put them in my oven with the light on just to keep them extra dry. Remember, when it gets dark outside, turn off all your lights and look at your glowing skull creations.

I have had many requests for this particular bath bomb. The beauty of it is, unlike most holiday knickknacks which need to be stored, this decoration can be used for a refreshing, soothing and glowing bath.
Now go have fun and relax.


where can I get the mold for the skull bath bomb? 8/5/16